XTS Update Process – Prior to 10.02.05
(PLEASE NOTE: This is a process for the XTS, not the XTSPlus. For more information on how to update the XTSPlus and tell the difference between the two please click HERE)
For the steps below you will need:
- PC running Windows 10 or Windows 7 on 64-bit
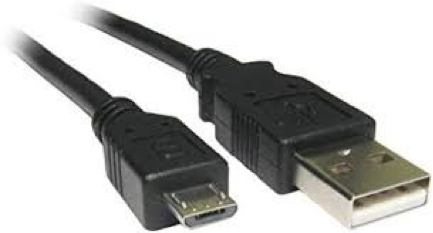
- USB A-Type to Micro USB Cable
- POE Ethernet or 12VDC power connection
- Phillips Screwdriver (#0)
Note: Step 5 below will need an internet connection, but only needs to be done once and can be done offsite with a computer and XTS so that when you visit the customer you do not need an internet connection to update the XTS.
- From the Now Playing Screen, tap the Settings icon in the top right
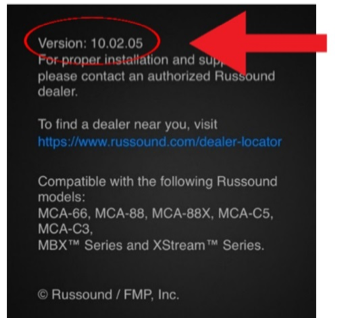
- From the Settings Menu, scroll down and tap the “About Russound XTS” option
- Confirm the Version Number
IMPORTANT: The update process below is only for units with versions lower than 10.02.05
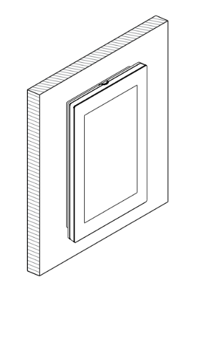
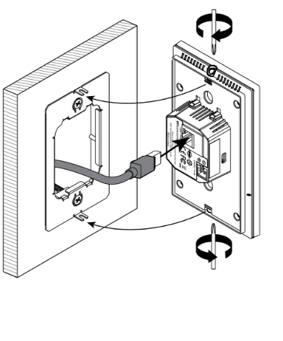
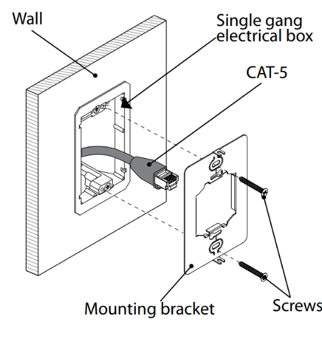
If mounted in a wall, remove the XTS touchscreen while leaving the power connection still attached.
The Phillips Screwdriver (#0) is used to loosen the captive locking screws
With the XTS touchscreen powered on:
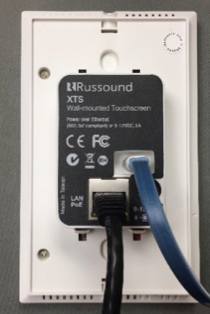
- Attach the Micro USB end of the USB cable to the Micro USB port on the back side of the touchscreen
- Attach the other end to a free USB port on a Windows 10 or Windows 7 PC.
- Windows will start the device detection and driver installation process. This may take a few minutes depending on the speed of your computer and speed of your Internet connection.
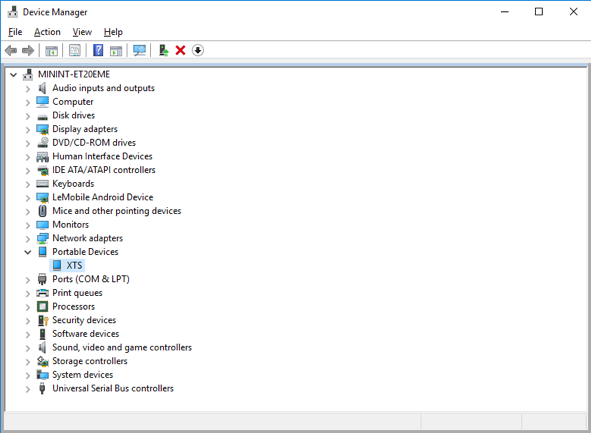
- In the Windows search bar, search for “Device Manager”
- Click the Device Manager Icon
- The XTS Touchscreen should appear in the device tree under “Portable Devices” as “XTS”
Download the update .zip file using the following link, and save it to a folder on your PC.
http://updates.russound.com/xts/XTS-ADB-Update.zip
This file is only for the XTS. It is NOT for the XTSPlus. For More info on updating XTSPlus and to see the difference between these click HERE
Note: This step only needs to be done once and can be done in advance so that when you visit the customer you do not need an internet connection to update the XTS.
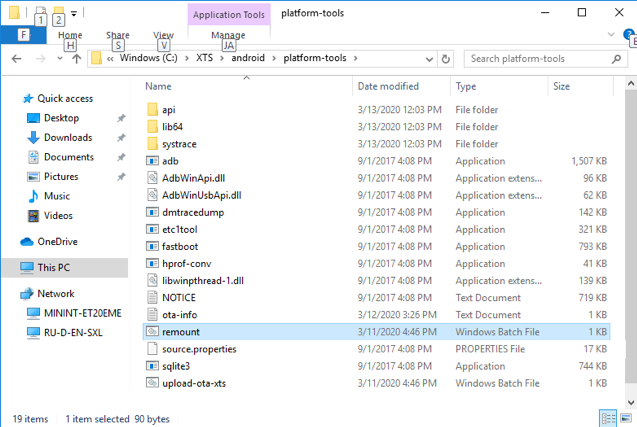
- Using File Explorer, browse to the download location on your PC and extract the .zip file contents. A Folder will be created that contains the necessary files.
- Using File Explorer, browse to the folder that contains the extracted files and then browse to XTS/android/platform-tools
- Double-click on the remount.bat script. A command prompt window should show temporarily.
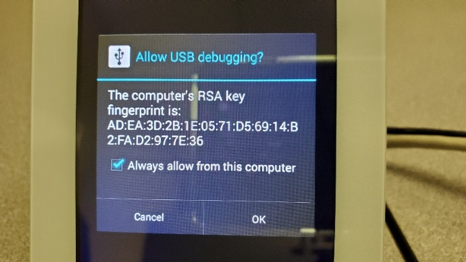
- On the XTS Touchscreen, you should see the Allow USB debugging confirmation dialog. Select “Always allow from this computer” and then select OK.
- Double-click upload-ota-xts.bat script. A command prompt window should show temporarily.
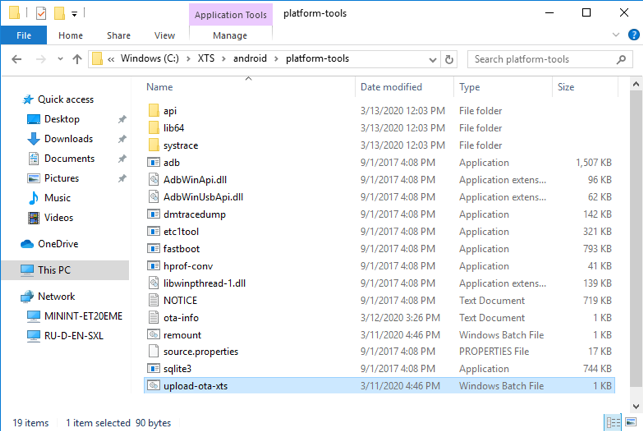
- The XTS will now modify the update settings and reboot.
On the XTS, go to Settings and tap “Check For Updates” and install the latest firmware update.
Wait for the update to finish. It usually takes about 1 minute and the XTS will reboot once during the process.
- From the Now Playing Screen, Press and Hold the Settings icon in the top right until “Admin Settings” appears
- Tap “Clear Cache and Data”
- The XTS will return to the searching for devices screen
- From the Settings Menu, scroll down and select the “About Russound XTS” option
- Confirm that the version is now showing 10.02.05 or higher